# Can I Repair a Damaged LCD Screen on a Writing Tablet?
—
How LCD Writing Tablets Actually Work — The Technology Behind the Screen
Before you can make any intelligent decision about repairing an LCD writing tablet screen, you need to understand what you are actually dealing with.
The term “LCD” in this context is both accurate and somewhat misleading, because the display technology used in writing tablets is quite different from the LCD panels in televisions, smartphones, or laptop computers. Understanding the distinction is not just academic — it directly determines whether repair is possible at all.
Cholesteric Liquid Crystals: Not the LCD You Know
The screens in writing tablets use what is known as cholesteric liquid crystal technology, sometimes called bistable liquid crystal display technology.
Unlike the LCD panel in your phone, which requires a constant backlight and active power to maintain an image, cholesteric liquid crystals are bistable — meaning they hold their state without continuous electrical power. The tablet only needs electricity when you press the erase button.
Manufacturers like GY-industries in Shenzhen have refined this technology extensively for children’s writing tablets and educational tools, developing screens that can withstand thousands of write-and-erase cycles while remaining thin, lightweight, and safe for children.
The simplicity of the technology is both its greatest strength and the reason why physical damage to the screen layer itself is so difficult to address.
The Structure of the Writing Surface
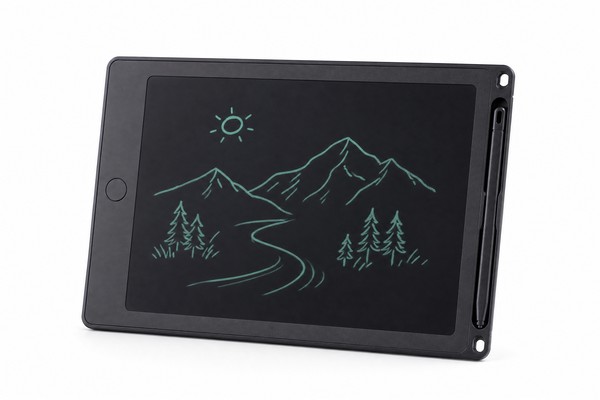
Think of the LCD writing tablet screen as a sealed sandwich. At the very front is a thin protective film that you write on. Beneath that is the upper electrode layer — a transparent, flexible conductor. Then comes the liquid crystal layer itself, which is where all the visual action happens.
Below that is the lower electrode layer, and finally a rear substrate, which in many tablets also includes a white or colored reflective backing that makes the dark marks visible.
The Role of the Circuit Board and Battery
The electronic components of a writing tablet are minimal by design. The core circuit board manages the erase function: when you press the erase button, it sends a brief, low-voltage electrical pulse across the electrode layers, which resets all the liquid crystals to their resting state simultaneously, clearing the screen.
A small battery — typically a button cell such as a CR2025 or CR2032, rated at 3 volts — provides the power for this single function.
—
Common Types of Damage and What They Really Mean
Not all damage is the same, and the appearance of a problem on your writing tablet’s screen does not always tell you what has actually gone wrong beneath the surface. This section walks through the most common damage scenarios that consumers and retailers encounter, with accurate descriptions of their underlying causes.
Physical Cracks and Pressure Damage
The most dramatic form of damage is a visible crack across the writing surface. This typically happens when the tablet is dropped onto a hard floor, sat upon, or subjected to a sharp impact. When you see a crack on an LCD writing tablet screen, you are looking at a breach in one or both of the plastic electrode sheets that form the screen sandwich.
Partial Screen Failure and Ghost Images
A more subtle and often more confusing problem is partial screen failure — where part of the screen works normally but another area refuses to erase, refuses to write, or shows a permanent pattern. Ghost images — faint marks that remain on the screen even after erasing — fall into a similar category.
Erase Function Failure
When the writing surface works perfectly but pressing the erase button does nothing — or the screen only partially erases — the problem is almost certainly in the electronic circuit rather than the screen itself. This is an important distinction because it opens up repair possibilities that physical screen damage does not.
—
What Can Actually Be Repaired — An Honest Assessment
This is the section where we need to be genuinely honest rather than optimistic. LCD writing tablets are low-cost, high-volume consumer products engineered for simplicity, and that design philosophy has important implications for repair. Some components can be fixed or replaced with basic tools and minimal electronics knowledge. Others simply cannot be repaired in any practical sense.
Repairs That Are Genuinely Feasible
The following repair actions are practical, affordable, and routinely successful when performed carefully:
- Battery replacement: This is the most impactful repair available. If the erase function has stopped working or become unreliable, replace the button cell battery (typically CR2025 or CR2032 — check the battery compartment or the product documentation). Use a fresh battery from a reputable brand, as low-quality button cells can have inconsistent output. The compartment is usually accessible with a coin or small Phillips screwdriver. Battery replacement costs pennies and resolves a significant proportion of reported “broken” tablets.
- Battery contact cleaning: If a new battery still does not restore erase function, examine the metal contact springs in the battery compartment. Oxidation (a dull, whitish or greenish film) on the contacts prevents reliable electrical connection. Gently clean the contacts with a cotton swab lightly dampened with isopropyl alcohol (90% or higher). Allow to dry completely before inserting the battery.
- Stylus replacement: Styluses are simple plastic tools with no electronics. A broken or lost stylus is straightforwardly replaceable. Most standard writing tablet styluses have an EMR-free design (they work through pressure alone, not electronics). If the original stylus is lost, many standard-tip styluses of the same diameter will work. Some manufacturers, including GY-industries, supply replacement styluses directly or through their retail partners.
- Case repair: Cracked or broken plastic housing can sometimes be repaired with appropriate plastic adhesive, though this is largely cosmetic. If the housing crack does not affect the screen, circuit board, or battery compartment, careful application of a suitable adhesive can restore structural integrity.
Repairs That Require Technical Skill
Beyond the simple fixes listed above, there is an intermediate category of repairs that are theoretically possible but require some technical knowledge, the right tools, and a willingness to accept that success is not guaranteed:
- Circuit board repair: If the erase button has a damaged contact pad, or if a trace on the circuit board has cracked (a more common issue than people realize in products that have been dropped), a person with basic soldering skills and the right fine-tip soldering iron can sometimes repair the break. This requires careful disassembly of the tablet, good lighting, magnification, and patience. The risk is making things worse — particularly damaging the fragile connection between the circuit board and the electrode layers of the screen.
- Erase button replacement: The tactile switch used for the erase button is a standard electronic component. If the button mechanism itself has failed (it clicks but does not make electrical contact), it can in principle be replaced with a matching component sourced from an electronics supplier. Again, soldering skill is required.
- Lock switch repair: Some tablets include a sliding lock switch that can become physically jammed or electrically intermittent. Mechanical cleaning or careful realignment may restore function.
Repairs That Are Not Practical
We must be direct: the liquid crystal screen layer itself cannot be repaired once physically damaged. There is no consumer-accessible method, and no professional service that makes economic sense, for the following:
- Cracked electrode layers within the screen sandwich
- Leaked or displaced liquid crystal material
- Delaminated screen layers
- Permanent ghost images caused by irreversible crystal stress
- Spreading dark blotches from impact displacement
—
DIY Repair Attempts: Risks, Limits, and Practical Steps
If you have determined that your problem is in the fixable category — battery, contacts, stylus, or possibly circuit board — this section provides practical guidance on how to approach a repair safely. It also addresses the real risks of DIY disassembly and how to minimize them.
Safe Disassembly of an LCD Writing Tablet
Most LCD writing tablets are assembled with a combination of screws (usually Phillips or JIS type, very small) and plastic snap clips. The back panel typically provides access to the battery and, in some cases, the circuit board. Here is a methodical approach to safe disassembly:
- Identify all fasteners before applying force. Look carefully around the entire perimeter and back surface of the tablet. Small screws are sometimes hidden under rubber feet or a label. If you apply prying force before removing a screw, you will break the plastic clips and potentially crack the housing.
- Use the correct screwdriver. Most tablets use size 00 or 000 Phillips screwdrivers. Using an oversized driver will strip the soft screws immediately. Invest in a proper precision screwdriver set — this applies to any repair attempt.
- Work on a clean, well-lit surface. Small screws and springs are easy to lose. A silicone mat or a piece of white paper helps you track components.
- Disconnect the battery before touching any circuit board connections. Although these devices operate at low voltage, good habits matter.
- Do not pull on wires or ribbon cables. The connection between the circuit board and the screen electrode layers is often made through a thin adhesive-bonded ribbon connector. Pulling this connector free can permanently destroy the screen’s erase functionality, even if the screen itself is otherwise intact.
Diagnosing the Real Problem Before Any Disassembly
Before opening anything, work through a logical diagnostic sequence. This is worth emphasizing because the majority of tablets that are reported as “broken” by consumers have a simple, non-destructive fix available:
- Does the stylus write on the screen? Try pressing firmly with a blunt-tipped pen (protected by a thin sheet of paper to avoid scratching). If marks appear, the screen layer is working. If no marks appear anywhere, the screen may be physically damaged internally.
- Does the erase button click? If there is no tactile feedback, the button mechanism itself may be broken. If it clicks but nothing happens, the circuit or battery is the likely cause.
- Have you replaced the battery recently? If you cannot remember, replace it now. This single action resolves a large proportion of erase failures.
- Is the lock switch engaged? Many tablets have a lock to prevent accidental erasing. If the lock is enabled, the erase button will appear non-functional. Check the switch position.
- Is the damage localized or whole-screen? A single dark blotch in one corner suggests impact damage to that area. A screen that simply shows nothing or shows no contrast suggests a different issue — possibly the reflective backing has delaminated, or there is a manufacturing defect.
When to Stop and Seek Replacement
There is a practical threshold beyond which further repair attempts are counterproductive. If you have replaced the battery, cleaned the contacts, confirmed the lock switch position, and the problem persists — and if the writing surface itself shows physical damage such as cracks, dark blotches, or spreading discoloration — the honest answer is that the screen cannot be economically repaired.
For B2B buyers, damaged inventory is a separate consideration — we address this in the next section specifically.
—
Repair vs. Replace: Guidance for Consumers and B2B Buyers
The repair-versus-replace decision looks different depending on whether you are a parent with one tablet or a business managing hundreds of units. This section addresses both perspectives with practical, actionable guidance.
Consumer Decision Framework: Repair or Replace?
For individual consumers and parents, the decision framework is straightforward once you have the right information. Here are the key considerations:
Repair is the right choice when:
- The problem is battery-related (the fix costs under $2 and takes 5 minutes)
- The stylus is the only damaged or missing component
- The housing is cracked but the screen and electronics work
- The tablet has sentimental value (personalized, gifted, etc.) and the screen damage is minor
Replacement is the right choice when:
- The liquid crystal screen shows physical damage (cracks, dark blotches, spreading discoloration)
- Circuit board repair has been attempted and failed
- The tablet is more than two to three years old and has been heavily used
- The cost of attempting repair approaches or exceeds the cost of a new unit
B2B Buyers: Managing Damaged Inventory and Quality Control
For importers, Amazon sellers, and toy retailers, damaged LCD writing tablets create specific business challenges. Understanding how and why damage occurs is the first step toward minimizing it.
GY-industries · Factory Direct · Shenzhen Ready to Source LCD Writing Tablets? Get factory pricing, free samples, CE/FCC/CPC certificates, and OEM/ODM consultation. Response within 24 hours. 📄 Get Free Quote 📱 WhatsApp Us ✉ Email Us ✓ Free samples available ✓ MOQ from 500 units ✓ CE / FCC / CPC certified ✓ 15+ years experience References [1] U.S.
Consumer Product Safety Commission. Toy Safety guidelines for children’s products. https://www.cpsc.gov/Business–Manufacturing/Business-Education/Toy-Safety [2] American Academy of Pediatrics.
AAP guidelines on media and children. https://www.aap.org/en/patient-care/media-and-children/ Related Articles Why Choose a Professional OEM/ODM Manufacturer for LCD Writing Tablets? Are LCD Writing Tablets Truly Safe for Children’s Eyes? What Customization Options Are Available for LCD Writing Tablets?
How Does GY-industries Ensure Every Tablet Passes Safety Testing?
LCD Writing Tablet Buyer Review Table
| Area | Buyer check | Evidence |
|---|---|---|
| Product factor | Buyer check | Evidence to request |
| Writing response | Test line clarity and pressure response | Sample review |
| Erase function | Confirm reset behavior and lock feature | Functional test |
| Durability | Review surface, stylus, and housing use case | Specification sheet |
Explore the LCD writing tablet product catalog to compare relevant product configurations for this sourcing decision.
For independent background guidance, buyers can consult ISO quality-management guidance and confirm the requirements that apply to their exact product and market.