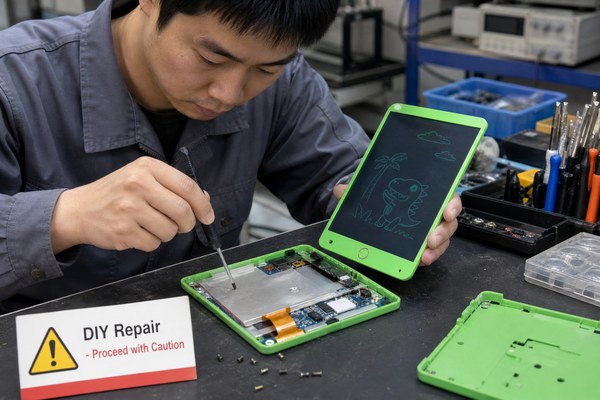
Your LCD writing tablet stopped working. You want to fix it yourself. But where do you even start?
Yes, you can disassemble and repair an LCD writing tablet yourself in some cases. Simple fixes like battery replacement or stylus issues are doable at home. But screen layer damage or circuit faults are harder. Knowing the difference saves you time and money.
I have spent years working closely with LCD writing tablet production. I have seen hundreds of tablets come apart on the factory floor. I know what breaks, why it breaks, and what a regular person can actually fix at home. In this article, I walk you through the real picture. I want to help you make a smart choice before you grab that screwdriver. Some repairs are easy wins. Others can make things worse. Let me show you both sides.
What Is Actually Inside an LCD Writing Tablet?
Most people think these tablets are simple. They crack one open and get a surprise. The inside is more layered than it looks.
An LCD writing tablet has a pressure-sensitive film, a liquid crystal layer, a back panel, a small circuit board, and a battery. Each layer serves a purpose. Damage one layer and the whole screen can fail. Understanding this helps you repair smarter.
I remember a customer who bought tablets from our Shenzhen factory. He tried to fix a cracked screen himself. He peeled back the top film carefully. But he did not know about the liquid crystal layer underneath. He pushed too hard. The liquid crystal spread. The whole screen turned black and patchy. The tablet was done. What started as a small crack became a full write-off. I felt bad for him. But it taught me something important. You have to know what you are touching before you touch it. At GY-industries, we build our LCD tablets with CE, RoHS, and CPC certifications. Every layer is tested. That also means every layer matters.
Inside an LCD Writing Tablet: Layer by Layer
| Layer / Component | What It Does | Can You Replace It? | Difficulty Level |
|---|---|---|---|
| Top protective film | Protects the writing surface | Sometimes | Medium |
| Liquid crystal layer | Displays writing when pressure is applied | No | Very Hard |
| Circuit board | Controls erase button and battery | Sometimes | Hard |
| Battery (coin or flat) | Powers the erase function | Yes | Easy |
Which Repairs Can You Actually Do at Home?
Not every repair needs a factory. Some fixes are totally doable on your kitchen table. You just need to know which ones.
Battery replacement, stylus tip swaps, and loose button fixes are all DIY-friendly repairs. You need basic tools and patience. These fixes do not risk the screen layers. I have seen everyday people do these repairs successfully with just a small screwdriver and a steady hand.
My neighbor bought a kids’ LCD tablet. The erase button stopped working after a few months. She asked me to look at it. I opened the back panel with a small flathead screwdriver. The coin battery had died. I replaced it in under five minutes. The button worked perfectly again. Her daughter was back to drawing that same evening. That kind of fix is totally within reach for most people. According to iFixit’s repair guides, simple electronics repairs like battery swaps are among the most successful DIY fixes. The key is to go slow. Do not force anything. Label your screws. Take a photo before you open the back. Small steps make a big difference.
DIY Repair Guide: What to Try at Home
| Repair Type | Tools Needed | Risk to Screen | Recommended? |
|---|---|---|---|
| Battery replacement | Small screwdriver | None | Yes |
| Stylus tip replacement | None | None | Yes |
| Loose erase button fix | Screwdriver, tweezers | Low | Yes, carefully |
| Screen layer repair | Specialist tools only | Very High | No |
When Should You Stop and Call a Professional?
Some damage looks small on the outside. But inside, it is already serious. Pushing further makes it worse.
If you see dark patches, permanent marks, or lines on the screen, stop. These are signs the liquid crystal layer is damaged. No DIY fix will solve this. You risk spreading the damage further. At this point, professional repair or tablet replacement is your best option.
I have seen this happen many times in our OEM and ODM work at GY-industries. A buyer once sent back a batch of tablets. They had tried to clean the screen layers themselves. They used alcohol wipes on the inside film. The liquid crystal reacted badly. Dark patches spread across the screen. The entire batch was beyond saving. It was a costly mistake. If they had contacted us first through our service page, we could have guided them. Our Shenzhen factory team handles these issues every day. We work with brands worldwide. We know what can be saved and what cannot. The honest truth is: screen-level damage needs factory tools and trained hands. Do not guess. Reach out first.
Damage Signs: DIY vs. Professional Needed
| Problem Symptom | Likely Cause | DIY Fix Possible? | Action to Take |
|---|---|---|---|
| Erase button not working | Dead battery | Yes | Replace battery |
| Stylus leaves no mark | Worn stylus tip | Yes | Replace stylus |
| Dark patches on screen | Liquid crystal damage | No | Contact professional |
| Screen won’t erase fully | Circuit or screen layer fault | No | Contact manufacturer |
Conclusion
Simple repairs are worth trying. Screen damage is not. Know your limits. For expert help or OEM support, contact GY-industries today.